7 Tips for Choosing the Right Garage Door Remote?

Choosing the right garage door remote can feel simple until the old one stops working beside your driveway. A replacement may look identical, yet its frequency, programming method, or security system can differ. This guide explores seven practical tips for selecting a dependable garage door remote without relying on guesswork. It considers compatibility, button layout, operating range, battery access, rolling-code security, and manufacturer support. Small details matter.

Real-world experience shows that compatibility should be checked before appearance or price. Look at the opener’s model number, remote frequency, and programming instructions. A universal remote can be useful, but it may not support every opener or smart-home feature. That assumption causes many failed purchases. It is also wise to verify information through the opener manufacturer’s manual or an authorized retailer. Reliable sources reduce confusion and help confirm whether the remote meets current safety and security expectations.

Think about daily use. Will the remote stay in a car, hang near the entryway, or operate through a thick garage wall? A firm case, clear buttons, and simple battery replacement can make a noticeable difference. However, no product is perfect. Even a reputable remote may have limited range because of metal doors, nearby electronics, or a weak battery. Testing the device after programming is essential. These tips are designed to help homeowners compare options carefully, avoid costly returns, and choose a garage door remote that fits both the opener and everyday routines.
7 Tips for Choosing the Right Garage Door Remote?

Confirm Compatibility: Match the Opener Model and 315/390 MHz Frequency

Before buying a garage door remote, identify the opener’s exact model number. Check the motor housing, wall control, or installation manual. Frequency alone is not enough. A 315 MHz remote may still fail if its coding system does not match the receiver.

The FCC Part 15 equipment database separates 315 MHz and 390 MHz radio devices, showing why these bands should not be treated as interchangeable. Confirm the frequency printed on the original remote or receiver. Then compare the replacement remote’s supported model list. Do not guess. A similar-looking remote can use a different signal format, memory capacity, or programming method. Some older openers require a physical switch setting, while newer receivers may require a learn-button sequence.

Safety remains part of compatibility. Consumer Product Safety Commission NEISS data have recorded thousands of garage-door-related injuries requiring emergency treatment over the years. A mismatched remote may create delayed operation, failed closure, or confusing behavior near the doorway. Test the door from a clear position after programming. Check whether the light flashes, the motor responds consistently, and the manual release still works. My practical mistake was trusting the frequency label alone; it ignored the opener’s generation. A technician’s model check is wiser when the label is worn, missing, or difficult to read.

Verify Security: Check FCC Part 15 Approval and Rolling-Code Technology

7 Tips for Choosing the Right Garage Door Remote

Verify Security: Check FCC Part 15 Approval and Rolling-Code Technology

Security should begin with the remote’s compliance label. In the United States, FCC Part 15 approval indicates that the device meets radio-frequency emission requirements. It does not prove strong cybersecurity or guarantee compatibility. Check the FCC ID in the official FCC database. Match the listed manufacturer, operating frequency, and device description with the product in your hand. A missing or unclear label deserves caution.

Choose rolling-code technology when available. Each button press generates a different access code, reducing the risk of replay attacks. However, the protection depends on proper receiver design and programming. Follow the installation instructions carefully. Do not rely on a generic compatibility claim alone. Test the remote from several distances, including through a closed garage. Small details matter, such as delayed response, inconsistent range, or a flashing indicator.

Human mistakes remain important. The 2024 Verizon Data Breach Investigations Report analyzed 30,458 security incidents and found human involvement in 68% of breaches. That finding does not measure garage remotes directly, but it highlights a practical lesson: secure hardware can still be weakened by careless setup. Store programming instructions privately, replace lost remotes promptly, and review older remotes after moving home. I would also question unusually cheap products. Price is not proof of danger, but missing documentation is a warning sign.

Assess Safety: Follow UL 325 Reversal and Entrapment-Protection Rules

Choosing a garage door remote is not only about range, buttons, or convenience. Safety deserves closer attention. The opener should support UL 325 reversal and entrapment-protection requirements for its installation type and location. Requirements may vary by local rules and installation date, so confirm details with a qualified technician.

Test the door in real conditions. Place a solid object, such as a new board, beneath the closing door and activate the opener. The door should reverse promptly after contact. Never test with a person, pet, or any part of your body. Check the photoelectric sensors too. They should face each other near the floor, with clear lenses and steady indicator lights. A small storage box can block the beam.

Keep the remote away from children. Mount wall controls where the door remains visible during operation. A remote that works from across the street may seem useful, but excessive range can create careless habits. It is easy to trust a recent installation too much. A clean-looking setup can still fail a reversal test. Batteries, alignment, spring tension, and floor level can affect performance. Record the test date and arrange professional inspection when the door hesitates, closes unevenly, or fails to reverse. UL 325 guidance supports safer design, but daily testing still depends on the owner.

7 Tips for Choosing the Right Garage Door Remote: UL 325 Safety Checks

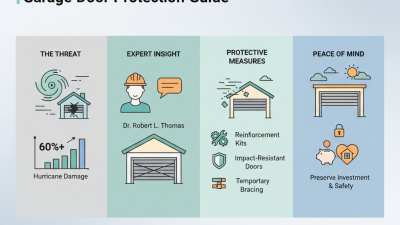
The chart presents seven practical safety checks for selecting a garage door remote. Each item is shown as a required verification point, not as a brand comparison or laboratory measurement. A compatible remote must not bypass the opener’s automatic reversal or entrapment-protection system.

Compare Usability: Evaluate Range, 2–3 Buttons, Batteries, and HomeLink

A garage door remote should work before you reach the driveway. The 2024 Parks Associates State of the Smart Home report found that 36% of U.S. internet households owned at least one smart-home device. That growth makes simple control more important.

Test the remote from the street, behind a concrete wall, and inside the car. Manufacturers often advertise open-air range. Real homes are messier.

Metal siding, parked vehicles, and radio interference can reduce performance.

Tip 1: Compare range in your actual routine.

A remote with two or three buttons may control multiple doors, lights, or gates. However, crowded buttons invite mistakes. Choose raised labels and clear spacing.

The National Institute of Standards and Technology recommends human-centered controls that reduce selection errors. Small details matter.

I once found a compact remote difficult to use with cold fingers, despite its strong signal.

Tip 2: Check the battery before buying.

Coin-cell batteries commonly provide 3 volts under IEC 60086 specifications, but capacity falls with cold temperatures and repeated use. Confirm the battery code, replacement cost, and low-battery warning.

Tip 3: If your vehicle supports universal in-car garage control, verify compatibility before installation.

It may remove the need for a handheld remote. Still, pairing can be confusing. Keep the physical remote during testing.

A backup is sensible, not excessive.

Buy Wisely: Confirm OEM Part Numbers, Warranty, and Return Policies

7 Tips for Choosing the Right Garage Door Remote?

A remote can look identical and still fail completely. Check the opener’s exact OEM part number before ordering. Match the frequency, button layout, programming method, and receiver type. DASMA technical guidance emphasizes compatibility between the remote and the complete opener system, not appearance alone. I once trusted a product photo and ignored a suffix in the part number. It was a costly mistake.

Read the warranty in plain detail. The U.S. Consumer Product Safety Commission’s injury surveillance reports continue to document tens of thousands of garage-door-related emergency visits annually, making dependable operation more than a convenience. A serious seller should explain coverage length, programming support, and exclusions. Ask whether the warranty covers replacement, shipping, or only a repair. Small wording matters.

Return policies deserve equal attention. Confirm the return window before opening the package, especially when programming may mark the device as used. Check who pays return shipping and whether restocking fees apply. Industry guidance, including DASMA technical documents and UL 325 safety requirements, supports using correctly matched equipment and testing the reversal function after installation. Keep the receipt and take a photo of the original label. A second check feels unnecessary. It often is not.

7 Tips for Choosing the Right Garage Door Remote? - Buy Wisely: Confirm OEM Part Numbers, Warranty, and Return Policies
Tip Decision Dimension What to Verify Reliable Evidence Why It Matters Common Warning Sign
1 Highest priority Confirm the exact OEM part number
Match the part number printed on the existing remote, original packaging, or the opener's user manual.
The complete alphanumeric part number, including suffixes, revisions, or regional identifiers. Similar-looking remotes may use different coding systems or be intended for different opener generations. A listing says “universal” but provides no compatible part numbers.
2 Compatibility Match the opener model and generation
Check the model information on the opener housing and compare it with the seller’s compatibility list.
A compatibility chart that identifies specific opener model numbers and supported remote families. Remote compatibility depends on the receiver and coding technology, not only on the remote’s appearance. Compatibility is described only as “fits most openers” without model-level details.
3 Signal system Check frequency and coding technology
Verify the required frequency or signal system and whether the remote uses fixed-code or rolling-code security.
Technical specifications, installation instructions, or the original remote’s documentation. Matching the frequency alone may not be sufficient if the remote and receiver use different encryption or programming methods. The listing gives a frequency but does not identify the coding or programming requirements.
4 Programming Review pairing and programming steps
Confirm whether the remote can be paired through the opener’s learn button and whether an existing remote is required.
Clear step-by-step instructions, required button sequence, and any stated programming limitations. A compatible remote may still be inconvenient or unusable if the required programming procedure is unavailable. The seller promises “easy setup” but provides no instructions or reset guidance.
5 Build and power Inspect construction and battery details
Look for the correct battery type, secure battery contacts, durable buttons, and a protective case.
A product specification listing the battery type and clear photographs of the front, back, and battery compartment. Poor contacts, weak buttons, or an incorrect battery can cause intermittent operation even when the remote is compatible. The battery is not included, the battery type is missing, or product photos are incomplete.
6 Warranty coverage Read the warranty terms before buying
Check the coverage period, included components, proof-of-purchase requirements, and exclusions for installation or physical damage.
Written warranty terms stating the duration, remedy, and process for replacement or repair. A written warranty provides a clear remedy if the remote fails during normal use. The listing says “guaranteed” without a stated duration or claim procedure.
7 Return protection Confirm the return and refund policy
Verify the return window, restocking fees, return shipping responsibility, and whether opened or programmed items are eligible.
A detailed policy showing the deadline, item-condition rules, refund method, and contact process. A clear return policy reduces the risk of being stuck with a remote that does not match the opener. Returns are described as “subject to approval” with no deadline or condition details.